RC101 Guide
Randy Adams
December 2022
Index
Sections
Preface 3
Building Surface and Building Boards 8
Adhesives 11
Plan and Instruction Reading
Building Techniques and Procedures
Coverings
Weight and Balance
Building From Plans
Scale Building
Preface
The GCRCC has been sponsoring RC101 for over 10-years and we have decided to commit some of the topics to written format, so it serves as reference material and historical knowledge. There is a passion with model builders to show techniques and pass them on to those who are interested in learning the art…and it is an art!
Building a model plane is rewarding and can provide hours of enjoyment when correctly built and prepared for flight, conversely if care and patience are not exercised, then the time spent building can dwarf the time it takes to destroy it.
It is safe to say that there is not a singular way to build an airplane. An individual can develop their own techniques. What we plan to do here is show the basics that are a combination of personal knowledge and experience. This will be a living document and will mature with technology, and industry trends. The art of building is dwindling due to offshore ARFs (Almost Ready to Fly) and bind and fly products. Our attempt with RC 101 is to give the interested party the knowledge to “want” to build, verses fly from a box.
Just like all hobbies an individual can invest large sums of money in tools and mechanisms to enhance their workshop, but decades of building existed before commercial products were available to take up workspace. A modeler can invest a very small amount of capital in building tools and still build quality airplanes.
The scope of this document will be limited to fixed wing models, but the same techniques can be used for rotorcraft (helicopters and quadcopters).
Hand Tools
Today the most used materials in kits are balsa and plywood. Many kits are laser cut and require very little cutting parts out, so basic tools will be good enough. In addition to cutting there is also the need to remove or smooth air surfaces and that is accomplished with sandpaper and sanding blocks. We will not be covering power tools, except drill bits and drill motors. While powered table saws and jigsaws enhance modeling, they are not essential for the entry level modeler.
Knives
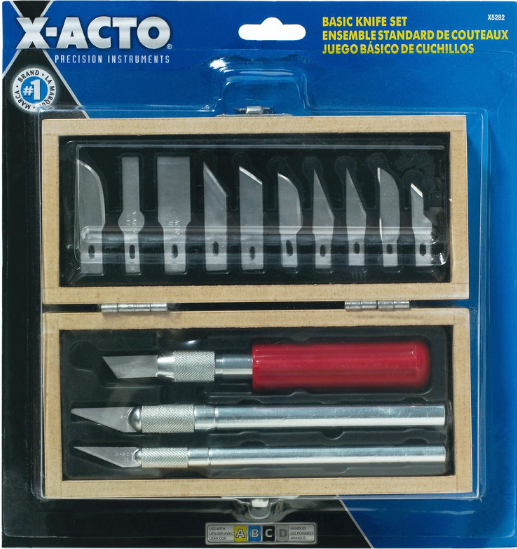
The most common tool in a modeler’s workshop is probably a Xacto-knife. Figure 1 shows the basic set of knives available from Xacto.
Figure 1
Xacto Knife Set
Most Xacto knives and supplies can be purchased at hobby shops and craft stores, as well as on-line.The knives shown here are used mostly for cutting thin sheet stock of balsa and plywood. They can also be used for cutting and trimming covering materials covered later in this document.
Saws
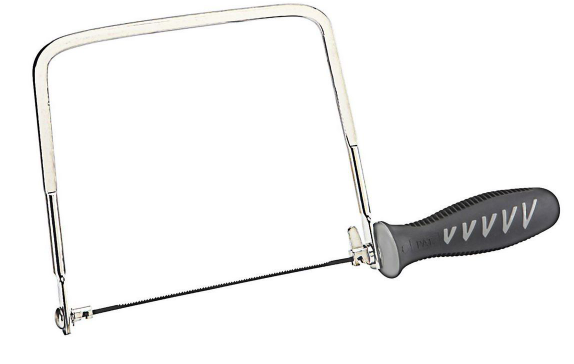
Coping Saw Figure 2
The Coping saw is used to cut shapes that are laid out in a non-linear pattern and are generally in a hardwood or plywood thickness greater than 1/64-inch. Balsa wood greater than 3/16-inch can be cut with a Coping saw and a fine blade, but caution needs to be used with how close the blade gets to the outline in the lighter density woods. The saw blades are interchangeable and come in fine, medium and coarse ratings.
Figure 2
Coping Saw
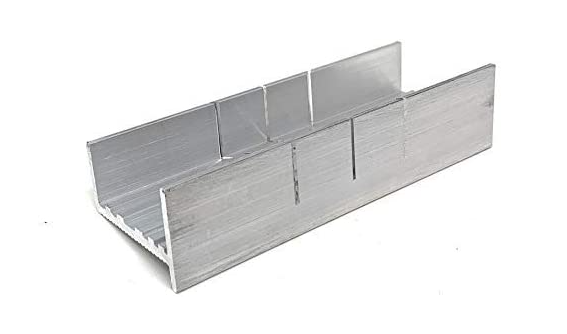
Zona Saw Figure 3
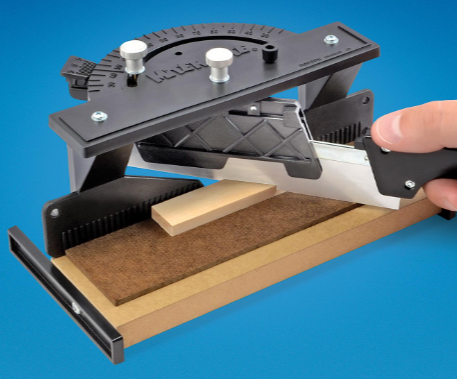
Zona saws are not essential, but come in very handy for making cuts in square, rectangular and circular woods. They are complemented with a miter box (Figure 4). Some aircraft have the need to cut odd angles and variable or protractor type miter box (Figure 5) allows for the modeler to make precise cuts.
Figure 3
Zona Saw
Figure 4
Modellers Miter Box
Limited to 90 and 45-degree cuts
Figure 5
Micro Marx Miter Cutter
Sandpaper and Sanding Block
Sandpaper and sanding blocks can be purchased at most hardware and lumber houses. It can be purchased in many different types and grits, but for our purpose 60, 150, 220 and 400 grit serve most of our needs. You can purchase sanding blocks, but many modelers just use scrap pieces of wood that are square and free of nicks and voids. Generally speaking the paper is cut oversize and held in place with contact adhesive or thumb tacks. Here is an excellent link to an article on sanding blocks and sand paper: https://www.airfieldmodels.com/information_source/model_building_tools/sanding_blocks.htm
Building Surface or Building Boards
The most important tool the model will own is a good flat level building surface and building board. Many modelers use T-pins to hold workpieces in place, so a board that allows the pins to be pushed in and held in place while the adhesive cures is essential. There are various opinions on what makes a good build board, but the consensus is a piece of fiber board sold under the name of Homasote and it can be purchased at most building and supply stores. It too must be placed on a workbench or table table top that is flat from end to end. This is key in building wings, fuselage side and tail feathers. Any flying surface that has a bow and twist in it, will have negative effects on performance.
Other common boards are ceiling tiles laid upside down and cork boards.
Building board coverings
It is a good idea to provide a degree of protection for your building board because over time debris such as glue, oil, paints etc make their way to the surface and can cause surface irregularities which leads to warps etc. Painters paper or shelving paper are good solutions because they can be replaced easily. A note on the shelving paper; you need to make sure that it’s smooth and it’s best to use the contact backing.
Holding Devices
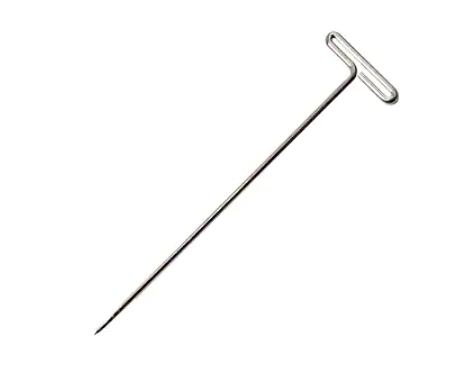
Generally speaking many of the parts of the model airplane are built on top of the plans. They serve as the template for the parts. A common tool used to hold the part(s) while the adhesive cures are T-pins (Figure 6).
Figure 6
T-pin
T-pins come in various sizes and can be purchased at hobby shops and craft centers.
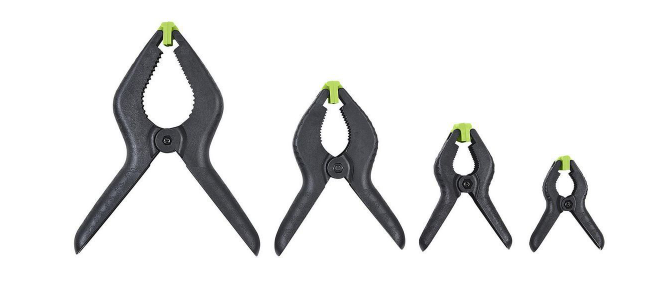
Other useful tools are plastic clamps (Figure 7). Clamps are not a necessity, but they sure make the art more user friendly.
Figure 7
Clamps
There are other forms of clamps that are useful and they can be found at most woodworking or lumber stores.
Adhesives
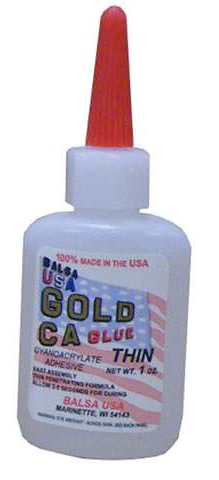
Adhesives are probably most talked about and cause many modelers to have very strong opinions. In the last 40-years traditional modeling glues have fallen to the wayside of Cyanoacrylates that were developed by Eastman Kodak in 1942 for plastic gun sites. It was introduced to the commercial market place in 1958 as Super Glue. It was used in Vietnam for field wound repair. In the late 1970’s it migrated to the model aviation sector and marketed under the names of Jet and Hot Stuff. Today you can find a plethora of vendors and distributors. For our discussion we will reference the brand sold by Balsa USA. You can find the product sold in viscosity levels of thin, medium and thick.
Thin - has the viscosity of water and cures within seconds
This is used for general assembly such as adhering a rib to a spar or joining a stringer to a bulkhead.
Figure 9
BUSA Gold Thin
Thick
of